Adding SmallWorld Components to Record Pages
After installing the SmallWorld Salesforce app, you'll need to add SmallWorld components to the record pages where your team works. This guide covers which components to add to each page type and how to configure visibility so only authorized users see them.
Components Overview
The SmallWorld package includes three Lightning components:
| Component | Description |
|---|---|
| SmallWorld | The core component that displays relationship data for a given record. Used on Contact and Lead pages. |
| SmallWorld Account Prospects | Displays prospects and relationship data at the account level. Used on Account and Opportunity pages. |
| SmallWorld Account Summary | Provides a high-level summary of relationship coverage for an account. Used on Account and Opportunity pages. |
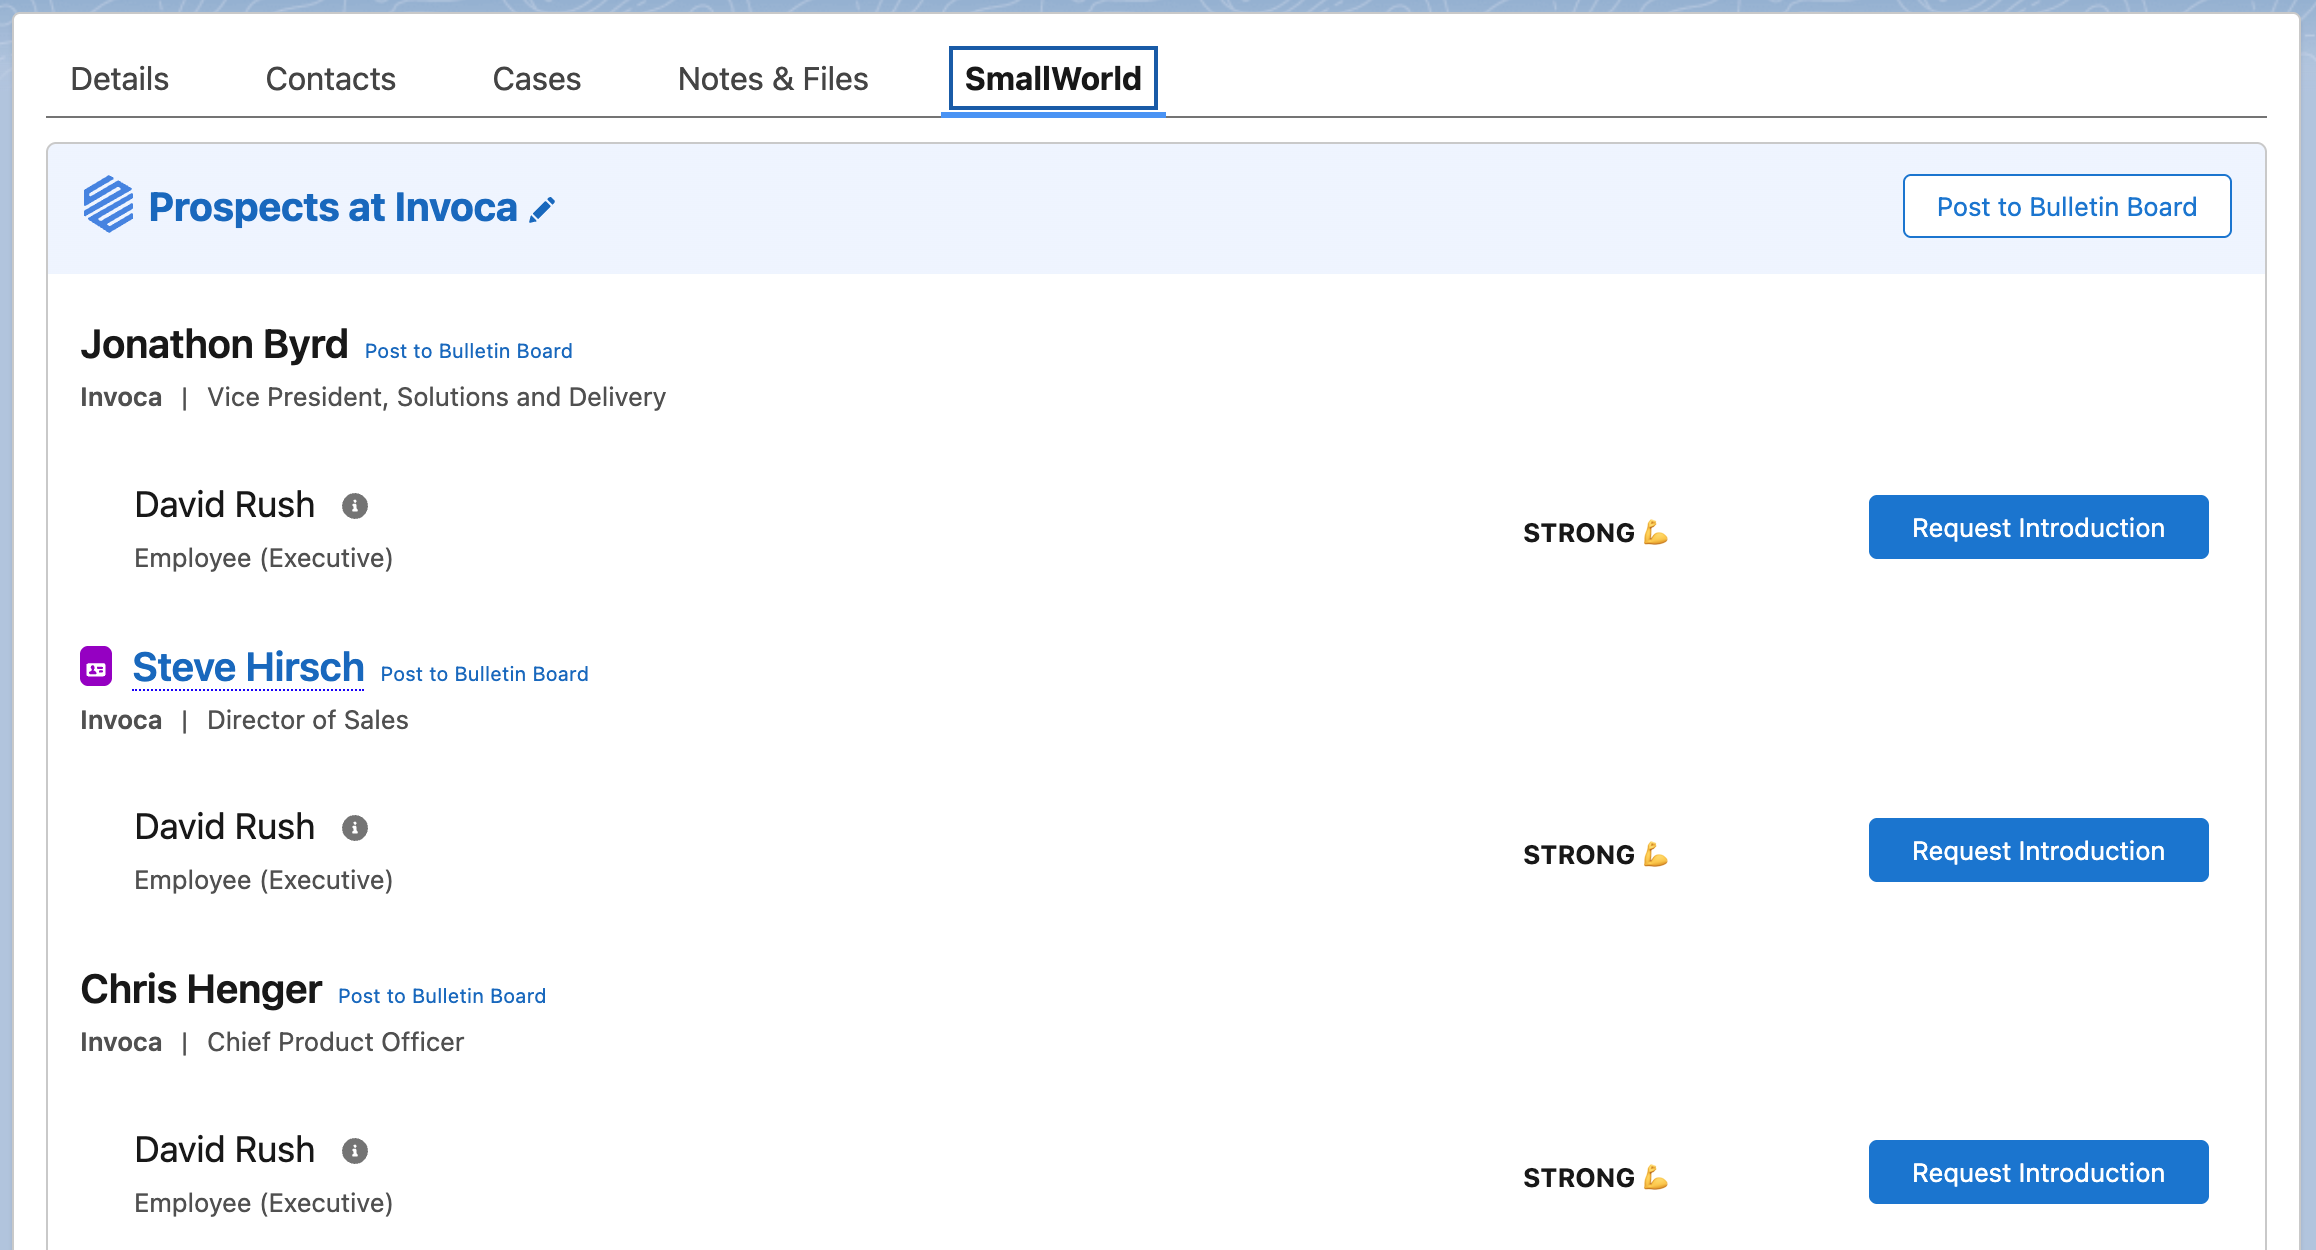
SmallWorld
Displays prospects at the account associated with the record, along with matched Connectors, relationship strength, and the ability to request introductions or post to the Bulletin Board.
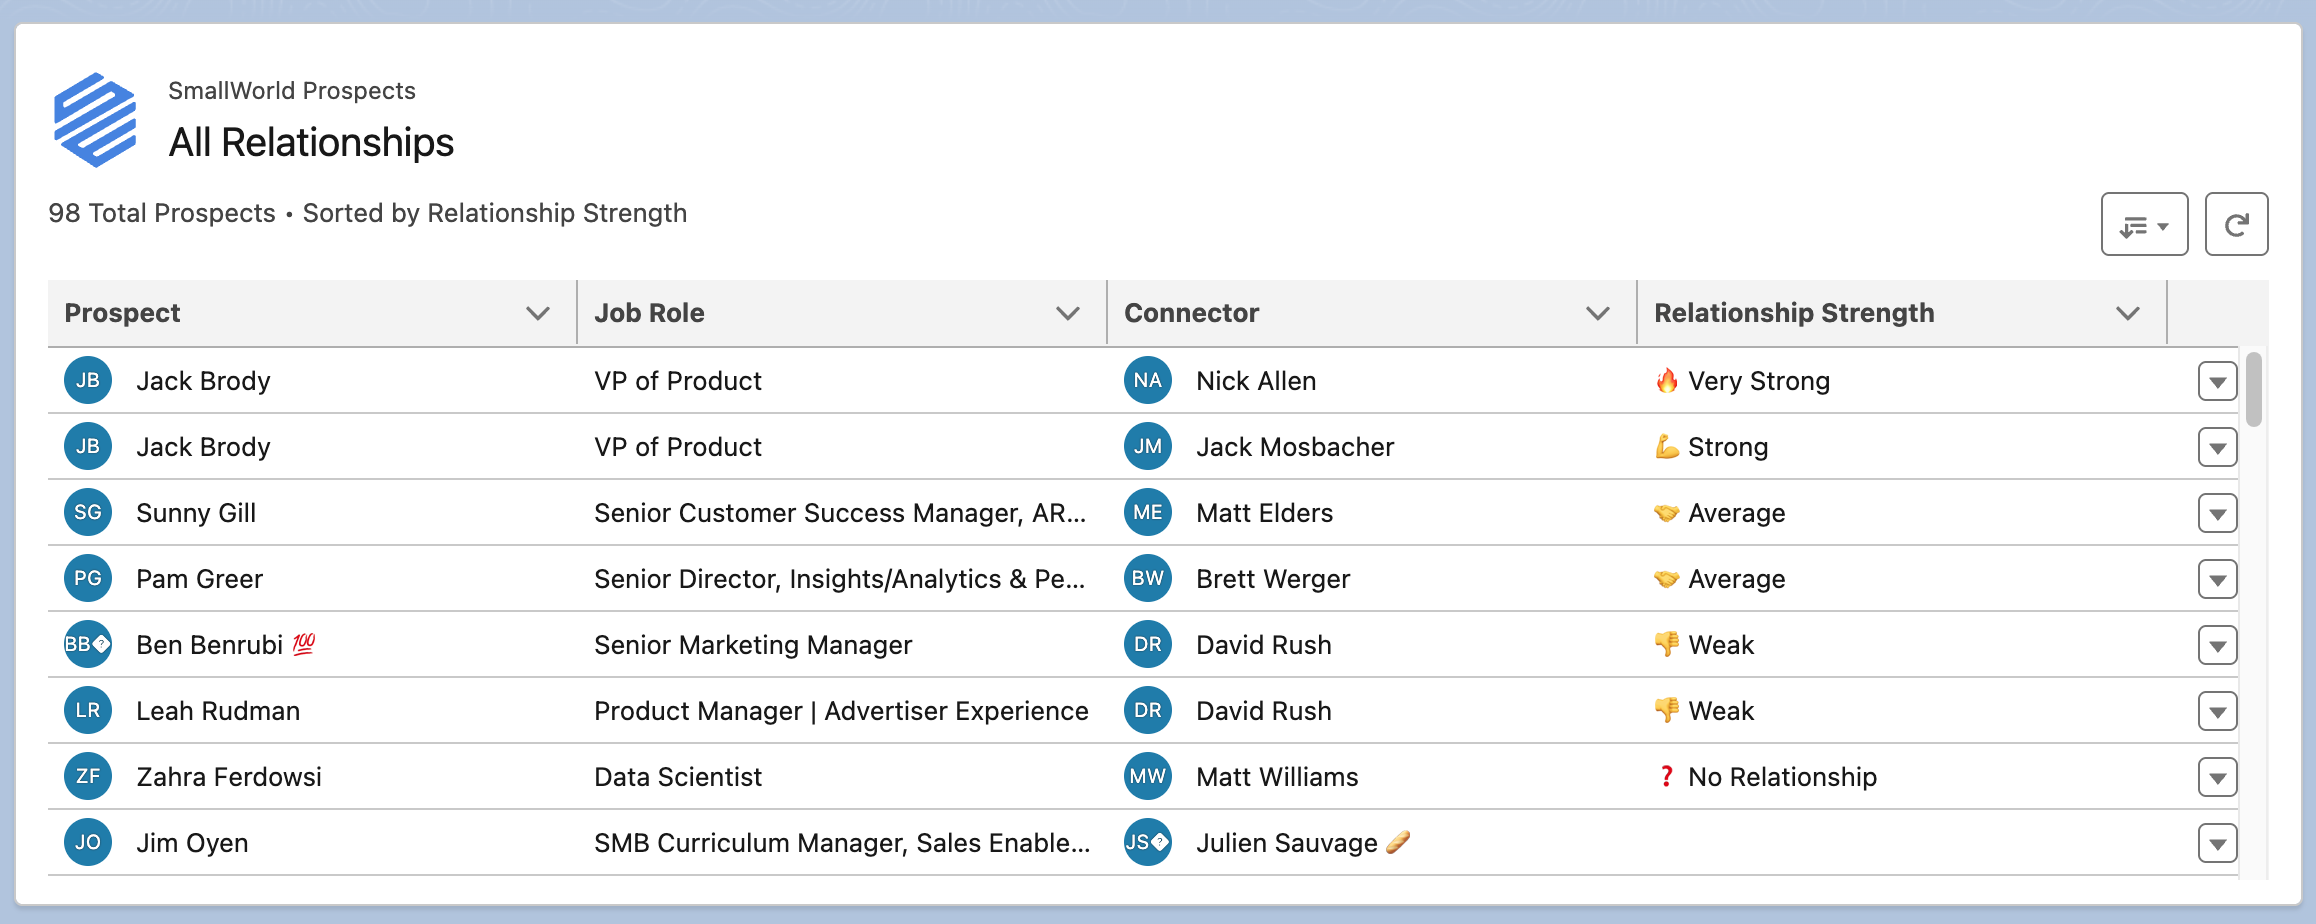
SmallWorld Account Prospects
Lists all prospects for a given account along with their job role, matched Connector, and relationship strength.
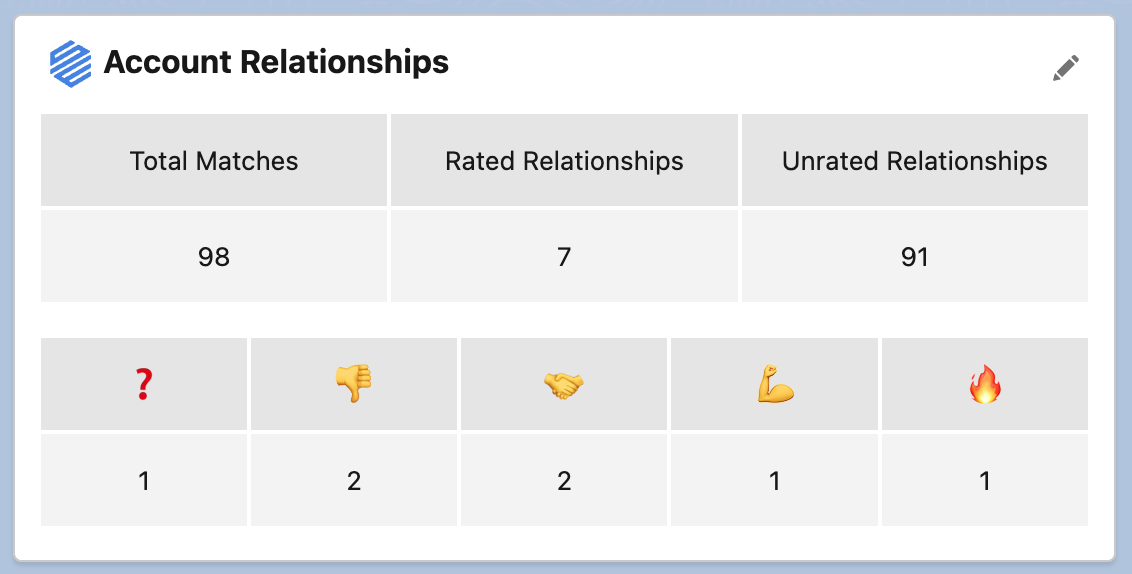
SmallWorld Account Summary
Provides a quick snapshot of total matches, rated vs. unrated relationships, and a breakdown by relationship strength.
Which Components Go Where
| Page Type | Components to Add |
|---|---|
| Account | Account Prospects, Account Summary |
| Opportunity | Account Prospects, Account Summary |
| Contact | SmallWorld |
| Lead | SmallWorld |
Adding Components to a Record Page
The steps below use the Account page as an example, but the process is the same for all page types. Repeat these steps for each page type, adding the appropriate components as listed above.
Step 1: Open the Lightning App Builder
Navigate to any record of the page type you want to edit (e.g., an Account record). Click the Gear icon in the upper right corner, then select Edit Page.
Step 2: Create a SmallWorld Tab
In the Lightning App Builder, click into the tabbed area of the page layout and select Add Tab. Choose Custom under Tab Label, set the label to SmallWorld, and click Done.
Step 3: Add the Components
In the left sidebar, search for SmallWorld. Drag the appropriate component(s) into the SmallWorld tab you just created.
For Account and Opportunity pages, add both:
- SmallWorld Account Prospects
- SmallWorld Account Summary
For Contact and Lead pages, add:
- SmallWorld
Step 4: Set Tab Visibility
Click on the SmallWorld tab itself (not the individual components). On the right panel, under Set Component Visibility, click + Add Filter, then select Advanced.
Click Select under Field, then choose Permissions > Custom Permission > SmallWorld.SmallWorld_User. Click Done.
Repeat to add a second filter for SmallWorld.SmallWorld_Admin. Make sure the filters are set to an OR condition so that users with either permission can see the tab.
Step 5: Save the Page
Click Save in the upper right corner. If this is a default page layout, it will be activated automatically. If prompted, choose the appropriate activation settings.
Step 6: Verify
Visit a record of the page type you just edited and confirm the SmallWorld tab appears with the correct components. If possible, also verify that a user without SmallWorld permissions does not see the tab.
Repeat for Remaining Pages
Follow the same steps for each remaining page type (Opportunity, Contact, and Lead), adding the components listed in the table above.
If your organization uses multiple page layouts for a given record type, you may need to add SmallWorld components to each layout separately.